Waterproofing
Waterproofing before moving on to finishes
Waterproofing is a layer no one sees after tiling, which makes it the easiest stage to cut short and the most expensive to tear out and redo. In wet rooms, on balconies and on roofs, the work starts with a clean, dry, level substrate with a slope to the drain, and continues with layers that go up the walls and are sealed around every pipe and every corner. A leak usually shows up at the downstairs neighbors' or in the adjacent wall, long after the job was handed over. So it's worth agreeing in advance on the waterproofing method, the areas covered and a flood test before anything is covered.
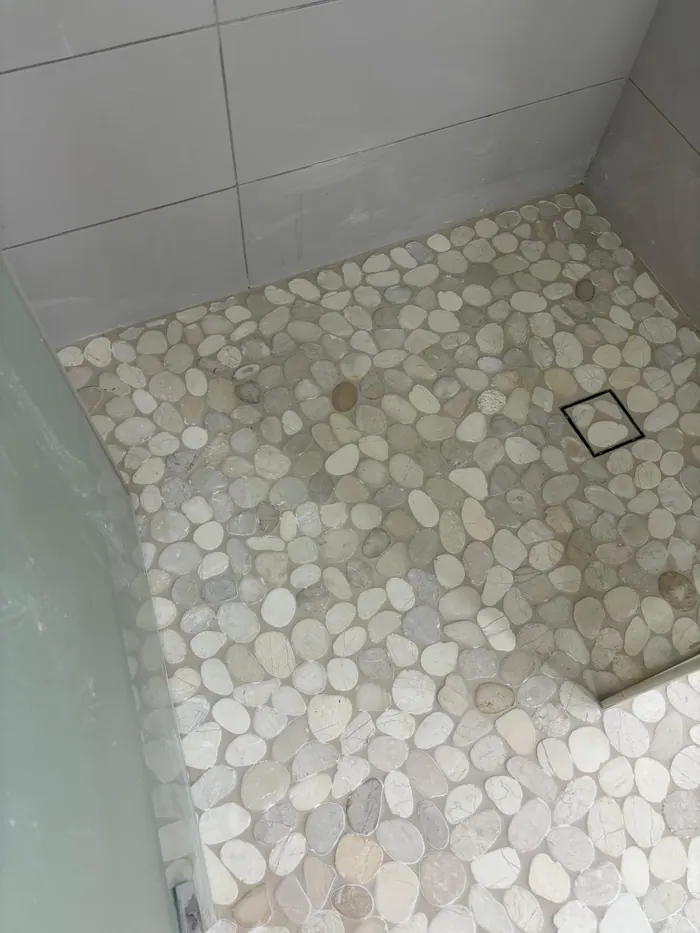
120-450 ₪
per m², common jobs
The range is a ballpark only. The final price is set after inspecting the property, the scope of work, the finishing materials and site conditions.
How much does waterproofing cost in 2026?
In 2026, waterproofing a roof with bitumen membranes costs 100-150 ₪ per m², including VAT, and polyurethane waterproofing 140-210 ₪ per m². That puts an 80 m² concrete roof at around 8,000-12,000 ₪ with membranes and 11,200-16,800 ₪ with polyurethane. Bathroom waterproofing is priced per room: 3,000-5,500 ₪, and a flood test before tiling adds 900-1,500 ₪. Waterproofing a tiled balcony costs 180-650 ₪ per m², because the tiles usually have to come up and be laid again.
Worked examples
| Job | Range |
|---|---|
| An 80 m² concrete roof, bitumen membranesBitumen membrane waterproofing × 80 m² | 8,000-12,000 ₪ |
| The same roof, polyurethane waterproofingPolyurethane waterproofing × 80 m² | 11,200-16,800 ₪ |
| Bathroom waterproofing with a flood testBathroom waterproofing + Flood test | 3,900-7,000 ₪ |
| A 12 m² tiled balconyTiled balcony waterproofing × 12 m² | 2,160-7,800 ₪ |
Where the figures come from: every range here is a line item in the RBM Contractors price list (version 2026.11, including VAT), and every example is a sum of line items times a quantity. The price list was checked against prices published in Israel on 14 November 2026. This is an estimate, not a quote.
What's usually included?
- Preparing the substrate
- Applying waterproofing materials
- Flood test where relevant
- Repairs before finishing
- Documenting the work area
What affects the price?
- Type of substrate
- Waterproofing area
- Access to the site
- Waterproofing method
- Repairs needed before application
How does RBM help keep it organized?
- Checking the substrate before application
- Approving the waterproofing method
- Inspection before covering
- Keeping photos and documentation
Stages of the work
- 01
Checking the substrate
The contractor checks the substrate: cracks, existing moisture, remains of old waterproofing and slopes to the drain. Together you decide what gets removed, what gets repaired before application and whether you need to wait for it to dry.
- 02
Choosing the method and areas
Based on the type of space and substrate, a waterproofing method is chosen and the areas to be covered are marked, including how high it goes up the walls. The homeowner approves the method and the specification in writing before work begins.
- 03
Preparation and detailing
Surfaces are cleaned, leveled and the corners rounded, and the weak points are treated: pipe penetrations, floor drains, thresholds and wall-to-floor joints. At this stage you coordinate with the plumber that all the pipes are in place, because they don't get moved after waterproofing.
- 04
Applying the waterproofing layers
The waterproofing layers are applied according to the chosen method, with reinforcing mesh or tape in the corners and at the penetrations. Each layer is left to dry before the next, and the contractor photographs every layer so the homeowner can see what was done.
- 05
Flood test
The drain is plugged, the area is filled with water and left flooded as agreed, and the walls and the ceiling below are checked. The homeowner or someone on their behalf sees the result and approves before moving on to tiling.
- 06
Protection and handover to finishing
After the test, the layer is protected from damage until the tiler starts work, and the area is handed over for finishing. This is where you agree on who is responsible if the waterproofing layer is damaged during tiling or installation.
What to check before you pay
- Ask for photos of every waterproofing layer, including the corners and pipe penetrations, before the next layer covers it.
- Make sure the waterproofing goes up the walls to the height agreed in the specification, and that it's continuous with no holes or exposed areas.
- Be there for the flood test or send someone on your behalf, and check the wall and the ceiling below the area yourself.
- After the finishing work, pour water on the balcony or the shower floor and make sure it flows to the drain without leaving puddles.
- Ask for a document that lists the waterproofing method, the layers and the areas treated, and keep it together with the photos.
Waterproofing price list by line item
8 line items · updated 11/2026
Bitumen membrane waterproofing
100-150 ₪
per m² · For roofs, after proper surface prep.
Polyurethane waterproofing
140-210 ₪
per m² · Suitable for certain situations, depending on the surface and access.
Acrylic waterproofing
50-130 ₪
per m² · For suitable roofs and surfaces, by number of coats.
Roof tarring
40-90 ₪
per m² · A basic solution for suitable roofs.
Bathroom waterproofing
3,000-5,500 ₪
per room · Includes prep and waterproofing layers, before tiling.
Tiled balcony waterproofing
180-650 ₪
per m² · The range is wide because the method depends on the condition of the tiles and drainage.
Exterior wall waterproofing
130-300 ₪
per m² · Affected by access, height and type of cladding.
Flood test
900-1,500 ₪
per test · Test only, no defect repairs.
Updated November 2026 · price varies by spec and site conditions
See the full price listQuestions about Waterproofing
Does waterproofing always include a flood test?
Not in every job, so it's important to ask before you sign. In wet rooms and on balconies, a flood test is the best way to see that the waterproofing works before it disappears under the floor tiles. Agree on who performs it, how long the area stays flooded and who checks the other side. The test should be documented in photos with the water inside the area. For example, if the water in the test never reached the corners and the joint between the wall and the floor, a leak may show up later, precisely in the wall of the next room or in the neighbors' ceiling.
Why does waterproofing have to come before the finishes?
Because the layer sits under the floor and wall tiles, and any repair to it later means removing them. Even a small hole from drilling, or a tile pressed down with force, can damage the waterproofing, so it is protected until the finishing work begins. The right order is pipes, waterproofing, testing and only then tiling. That way you can also photograph each stage before it is covered. A common example is screws for a towel rail or a curtain rod drilled through the waterproofing, so plan where they go before the waterproofing starts and mark them on the plan.
Can a balcony be waterproofed without removing the tiles?
Some methods are applied over existing tiles, but they suit only certain situations, depending on the condition of the tiles, the slopes and the drainage. If water is already getting under the tiles or the slope is wrong, removing them may be unavoidable. Ask the contractor to explain why the method he is proposing suits your balcony specifically. Also ask what happens to the thresholds and the balcony door if the floor rises. Signs that water is already under the tiles are crumbling grout, tiles that sound hollow when tapped, or stains on the ceiling of the apartment below, even small ones.
How do you find where moisture in a wall is coming from?
Moisture can come from a leaking pipe, damaged waterproofing in the shower, a balcony or a roof, and sometimes from the neighbors' apartment. Before choosing a method, find the source, because waterproofing in the wrong place won't stop the water. In complex cases, consult a leak detection professional. Recording when and where the stain appears helps a lot in finding it. For example, a stain that appears only after a shower points to a different problem than a stain that appears after rain, so someone who waterproofs the roof instead of checking the shower won't solve anything.
How do you compare waterproofing quotes?
Compare the waterproofing method, the number of layers and the areas covered, not just the total price. Check what is included in preparing the substrate, who handles pipe penetrations and corners, and whether a flood test and repairs after it are included. A cheap quote that skips preparation or testing can end up costing more later. Ask for the method and layers to be written into the quote itself. It's also worth asking each contractor how he handles the floor drain and the door threshold, because leaks are especially common there and the answer tells you a lot about the quality of the work.
How do you keep waterproofing working over time?
Keep drains and traps clean, because standing water looks for a way out. Don't drill into the shower floor or the balcony without checking what is underneath, and check the silicone around the bathtub and shower enclosure from time to time. Keep the photos and the specification, so that if moisture appears it's clear what was done and where. An early sign of a problem is dark grout around the shower that never dries, or silicone that has turned black and is peeling. Deal with it right away rather than waiting for a stain on the wall of the next room.
Related renovation work
Roofs and roof tiles
1,200-85,000 ₪
by roof, repair or m²02Damp, mold and leak detection
150-15,000 ₪
by findings and scope of treatment03Kitchen
35,000-180,000 ₪
per kitchen renovation, including related work04Doors and windows
1,500-40,000 ₪
by item and size05Carpentry and interiors
3,500-70,000 ₪
by item and custom carpentry06Air conditioning
1,500-85,000 ₪
by installation and systemRegistered renovation contractors by city
- Jerusalem992
- Tel Aviv-Yafo487
- Rishon LeZion410
- אום אל-פחם343
- Petah Tikva315
- Be'er Sheva294
- Nazareth282
- Netanya253
- Haifa252
- Ashkelon244
- Holon244
- Ramat Gan214
- Ashdod208
- Herzliya182
- Hadera171
- Rehovot164
- Kfar Saba161
- טייבה157
- עילוט149
- מעלה עירון136
- Hod HaSharon125
- Ra'anana124
- Bnei Brak117
- מג'דל שמס107
Looking for a contractor for waterproofing?
Build a project file with a cost range, milestones and terms, and send it to contractors who work in an organized way.
Build a project file